| View previous topic :: View next topic |
| Author |
Message |
Rhanagar
Lifetime member


Joined: 12 Jan 2010
Posts: 4861
Location: Preston, Lancs.
|
 Posted: Tue Sep 21, 2010 19:17 Post subject: Posted: Tue Sep 21, 2010 19:17 Post subject: |
 |
|
| BUNNY_PL wrote: |
| Rhanagar wrote: |
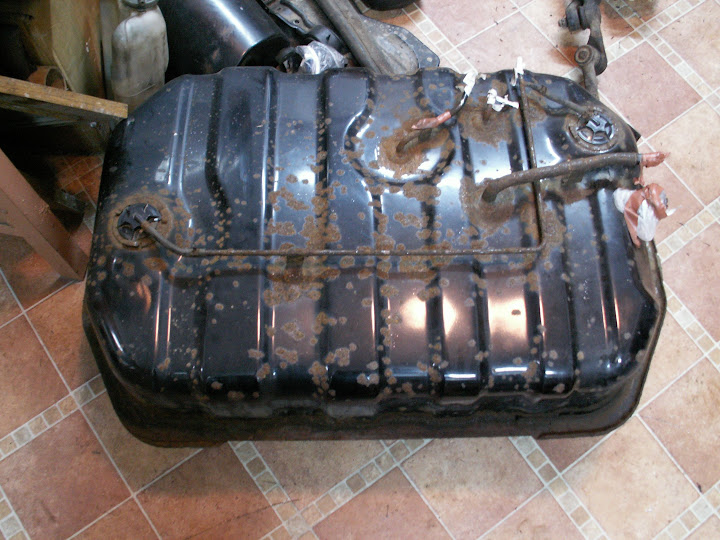
| Good project ... though one thing I would look at is if the fuel tank is connected to the body or chassis. |
I have already checked that - its connected to the chassis so it shouldn't be a problem  |
Good lad ... dont forget the steering column as well 
_________________
1990 Isuzu Bighorn LWB Mk.I 2.8TD Manual Lotus Edition
1994 Isuzu Bighorn LWB Mk.II 3.1TD Auto Lotus Edition
Deceased
1994 Isuzu Bighorn LWB Mk.II 3.1TD Auto LS
 |
|
| Back to top |
|
 |
Google
Sponsor

|
| Posted: Tue Sep 21, 2010 19:17 Post subject: Google Ads keep this community free to join! |
|
|
|
|
| Back to top |
|
|
BUNNY_PL
***

Joined: 18 Jan 2009
Posts: 136
Location: Poland
|
| Posted: Tue Sep 21, 2010 21:53 Post subject: |
|
|
Hello
Yesterday i was fighting with bolts mounting body on the frame. It wasn't easy considering amount of rust on them.. I had to cut off one of it. That was a good news bad news is that : brake line nuts are so rusty that its impossible to undo them. I will have to cut them off and make new copper brake lines. I will be changing rubber brake pipes so now i will have everything new  I disconnected everything in engine bay except steering column I disconnected everything in engine bay except steering column  i will not forget about it Rhanagar ! will do it rommotow i will not forget about it Rhanagar ! will do it rommotow
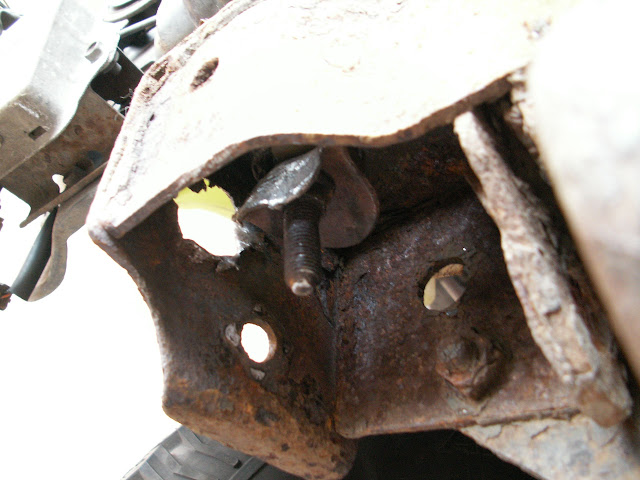
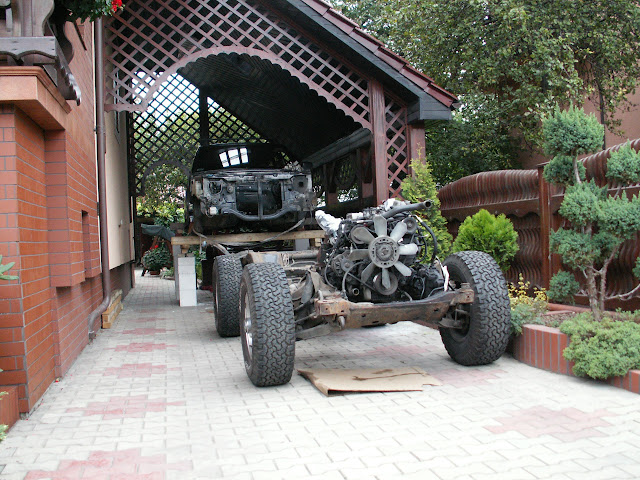
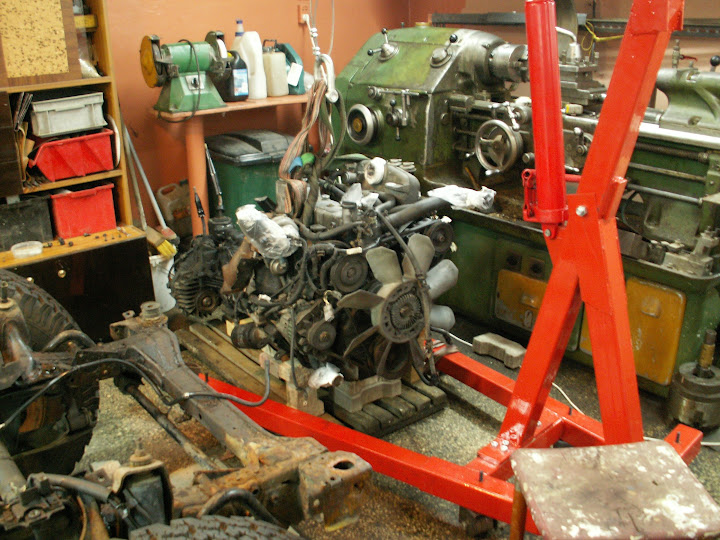
this one lost his head
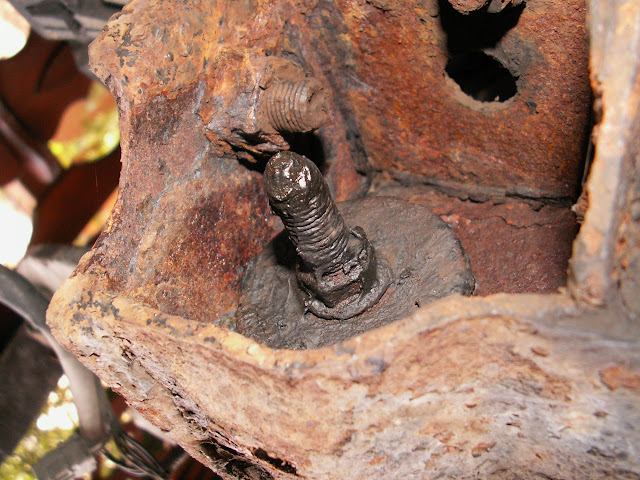
this is how most of the things in this car looks like 
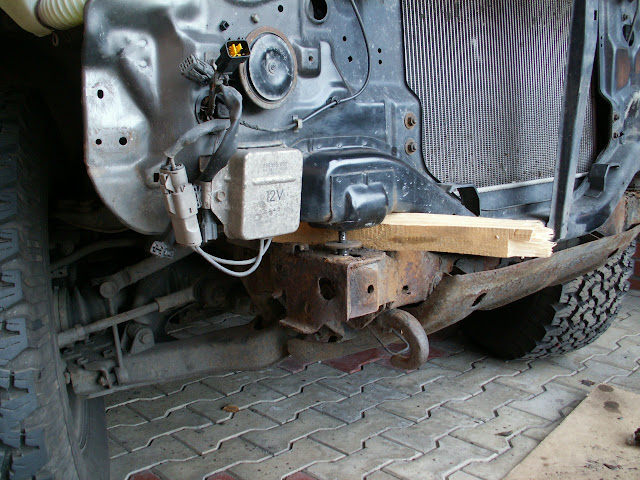
wooden stick is very helpful
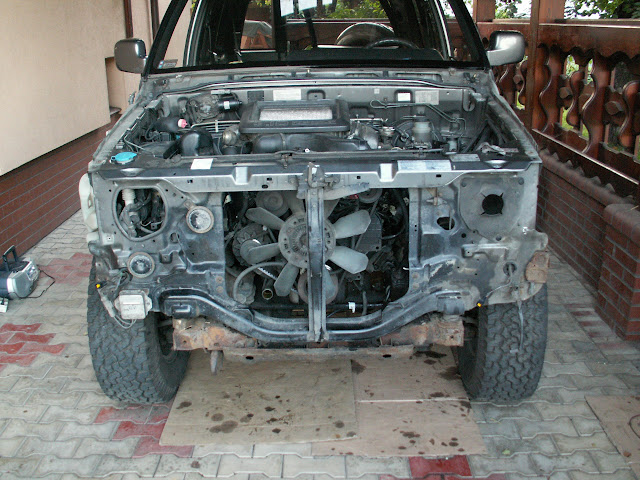
without radiator
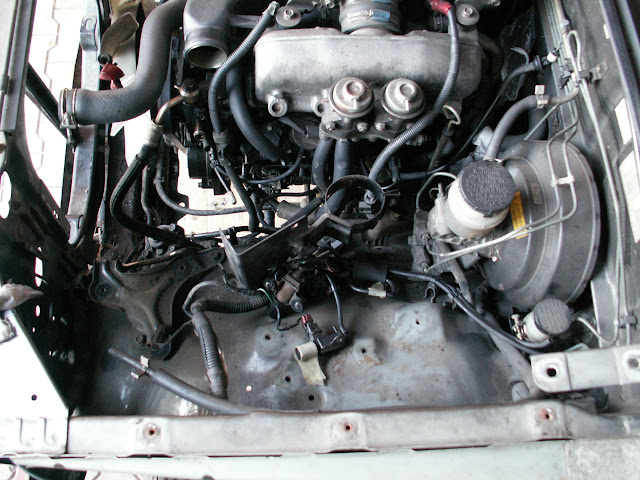
empty engine bay
I hope tomorrow i will end up with this part of restoration and i will start working with the frame  |
|
| Back to top |
|
|
BUNNY_PL
***
Joined: 18 Jan 2009
Posts: 136
Location: Poland
|
| Posted: Sun Sep 26, 2010 14:15 Post subject: |
|
|
Hello
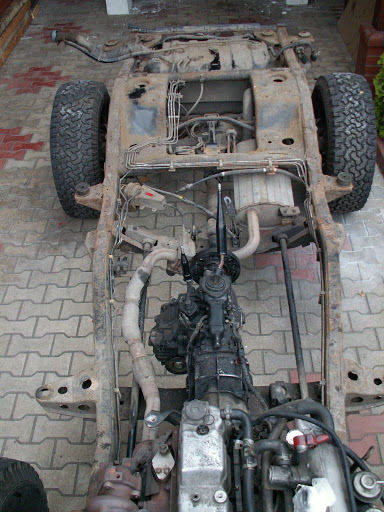
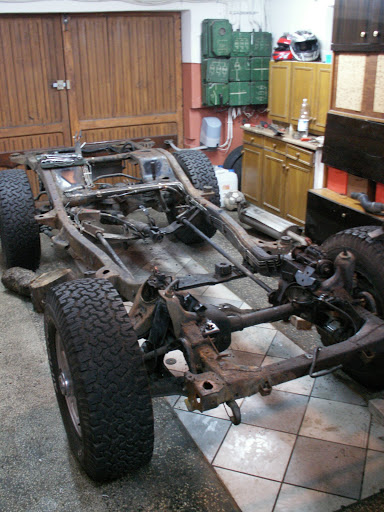
After 2 days of lifting i finally made it Frame is out ! and after some quick wash its not loking so bad - but photos are made before bath
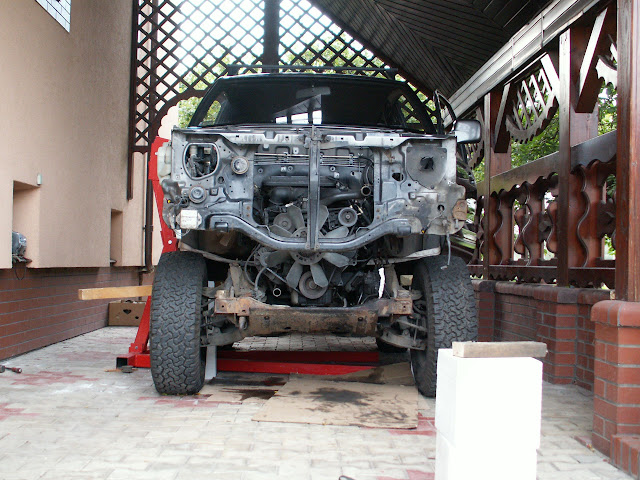
I was using engine jack of my production
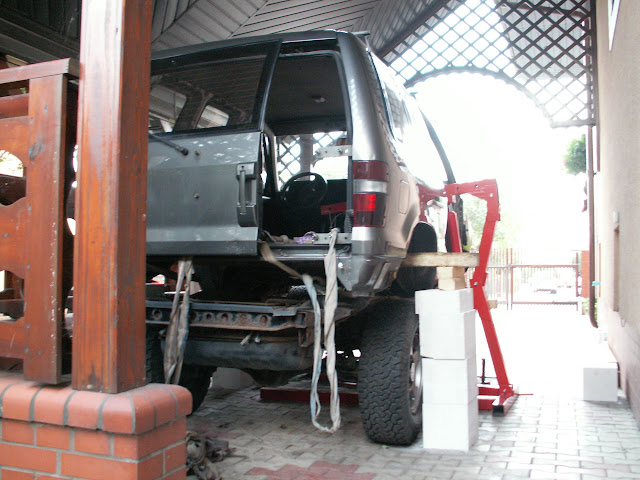
that looks scary 

fuel and brake lines will be new also some exhaust parts..

Now i have to remove some more things like engine and i will give it to sanding ! |
|
| Back to top |
|
|
Red Robbo
Lifetime member

Joined: 17 Feb 2008
Posts: 4129
Location: Where ever I happen to be in my imagination but mainly Far East Sussex
|
| Posted: Sun Sep 26, 2010 15:48 Post subject: |
|
|
Cracking job Bunny,also I'm sure these pics will be of use to others in the future..
_________________
Khotso........... |
|
| Back to top |
|
|
pgretton
*
Joined: 21 Sep 2010
Posts: 36
Location: Rural Norfolk
|
| Posted: Sun Sep 26, 2010 16:56 Post subject: |
|
|
Wow, Im very impressed!
good luck getting it back together again |
|
| Back to top |
|
|
BUNNY_PL
***
Joined: 18 Jan 2009
Posts: 136
Location: Poland
|
| Posted: Tue Sep 28, 2010 22:49 Post subject: |
|
|
Thanks guys this pictures will stay forever !
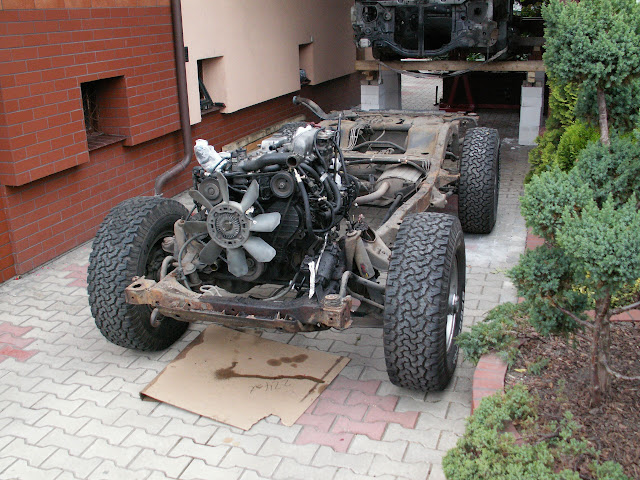
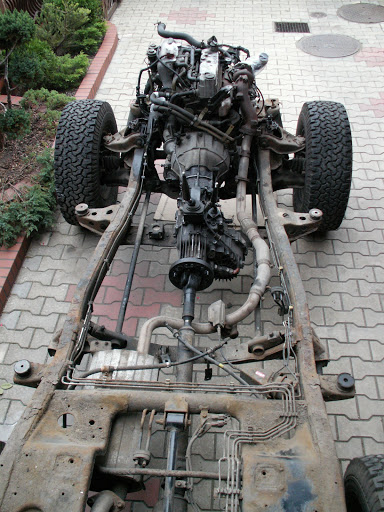
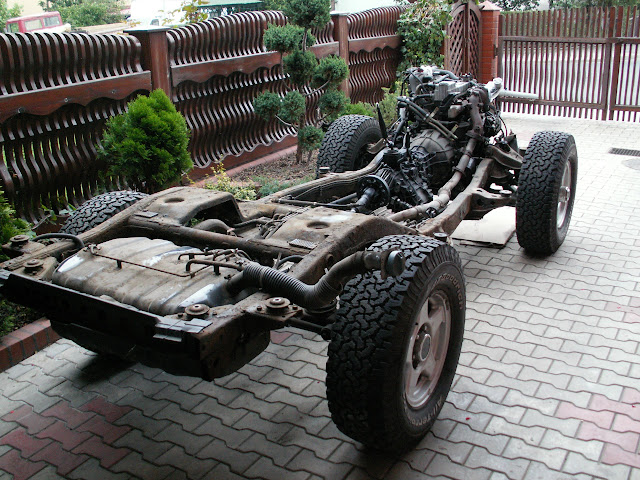
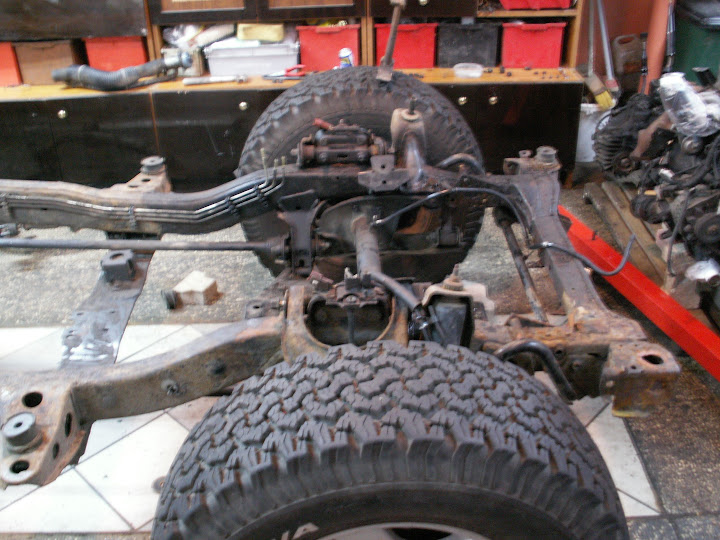
I had to move to my garage becuase its raining for 3 days now. I removed engine, geabox, power steering, exhaust and fuel tank. Now i only have to drop front and rear axle. The problem is that front axle screw are so fuc#in tight and rusty i've lost a key already... i will have to cut them off but there is not enough of space  But i will do that somehow . Here You can see how it looks like right now. But i will do that somehow . Here You can see how it looks like right now.
i will have to replace this rusty tubes.
 |
|
| Back to top |
|
|
badendesigns
Lifetime member

Joined: 01 Feb 2010
Posts: 851
Location: Wales
|
| Posted: Wed Sep 29, 2010 8:22 Post subject: |
|
|
Dayum that's a good job so far. I would like /10th of your guts for attempting that!
_________________
99/00 Frontera B 3.2 V6
79 XS1100
82 XS1100 midnight
87 454 LTD
Lovin it!!!!!
Wear sunscreen
LTM 000103 |
|
| Back to top |
|
|
DYLAN
Moderator


Joined: 25 Sep 2006
Posts: 5115
Location: Chesterfield, Derbyshire
|
| Posted: Wed Sep 29, 2010 15:00 Post subject: |
|
|
Your doing a great job 
_________________
 
2002 S-TYPE JAGUAR 3.0 SPORT |
|
| Back to top |
|
|
dieseldog69
***
Joined: 27 Nov 2009
Posts: 164
Location: Bloody Belgium now!!!
|
| Posted: Wed Sep 29, 2010 18:53 Post subject: |
|
|
WOW
Am glad its you not me, but hey it'll be more fun putting it back together, |
|
| Back to top |
|
|
BUNNY_PL
***
Joined: 18 Jan 2009
Posts: 136
Location: Poland
|
| Posted: Wed Sep 29, 2010 19:03 Post subject: |
|
|
thanks guys
I cant wait to put it all back together |Today i managed to remove all rusty screws it was not a picnic tomorrow i will post some bigger update. |
|
| Back to top |
|
|
MikT725
*****
Joined: 16 Nov 2008
Posts: 684
Location: West Yorkshire
|
| Posted: Wed Sep 29, 2010 19:20 Post subject: |
|
|
Brilliant thread Bunny ill be following with interest id love to have the time and space to do this to mine but i dont think the neighbours would appreciate me doing it on the roadside also i would have to take the bus to work
_________________
1999 3.1td SWB Trooper. RIP
2004 3.1td LWB
 |
|
| Back to top |
|
|
BUNNY_PL
***
Joined: 18 Jan 2009
Posts: 136
Location: Poland
|
| Posted: Wed Sep 29, 2010 20:26 Post subject: |
|
|
| my neighbours already hate me after some serious hammering in the evening |
|
| Back to top |
|
|
Mork_77
Lifetime member

Joined: 02 Jan 2008
Posts: 797
Location: Northumberland
|
| Posted: Wed Sep 29, 2010 20:53 Post subject: |
|
|
I thought at first you would just be taking the bumpers off and painting them or something, taking the whole body off is crazy, definitely enjoying your updates.
And here is me putting off taking the rear bumper off incase I break something, haha. |
|
| Back to top |
|
|
Jimbob
*
Joined: 28 Jun 2008
Posts: 37
Location: High Wycombe
|
| Posted: Wed Sep 29, 2010 23:10 Post subject: |
|
|
Hats off to you Bunny
That is one full on project and big respect for taking on the challenge
Good Luck and we will be waiting for the next set of pics.
Jim. |
|
| Back to top |
|
|
The Laird
Guest
|
| Posted: Thu Sep 30, 2010 0:38 Post subject: |
|
|
| If you are not careful there will be a queue of people wanting you to re-furbish their Troopers! |
|
| Back to top |
|
|
|


