| View previous topic :: View next topic |
| Author |
Message |
DYLAN
Moderator


Joined: 25 Sep 2006
Posts: 5115
Location: Chesterfield, Derbyshire
|
 Posted: Sat Nov 05, 2011 16:24 Post subject: Posted: Sat Nov 05, 2011 16:24 Post subject: |
 |
|
It might be ready just in time for my Christmas present  
_________________
 
2002 S-TYPE JAGUAR 3.0 SPORT |
|
| Back to top |
|
 |
Google
Sponsor

|
| Posted: Sat Nov 05, 2011 16:24 Post subject: Google Ads keep this community free to join! |
|
|
|
|
| Back to top |
|
|
gary820
Lifetime member


Joined: 08 Apr 2007
Posts: 2427
Location: Yorkshire
|
| Posted: Sat Nov 05, 2011 18:42 Post subject: |
|
|
Looking good.
_________________
landcruiser 80 series 4.5, 35's/33's for road, 2inch lift, discreet winch, sliders/armour, factory lockers, stainless side exit +++++ |
|
| Back to top |
|
|
adz1973
Lifetime member
Joined: 11 Aug 2009
Posts: 1908
Location: Co Durham
|
| Posted: Sat Nov 05, 2011 19:09 Post subject: |
|
|
Looks like the light at the end of the tunnel can be seen 
What a job you have done so far, looking good.
_________________
  |
|
| Back to top |
|
|
Da Gregsta
**

Joined: 11 Jul 2011
Posts: 76
Location: Kent
|
| Posted: Mon Nov 07, 2011 0:52 Post subject: |
|
|
Looking really good fella...that standox is a nice clear, good choice  |
|
| Back to top |
|
|
BUNNY_PL
***

Joined: 18 Jan 2009
Posts: 136
Location: Poland
|
| Posted: Wed Nov 09, 2011 19:36 Post subject: |
|
|
Thank You all 
I think i will finish before THIS Christmas
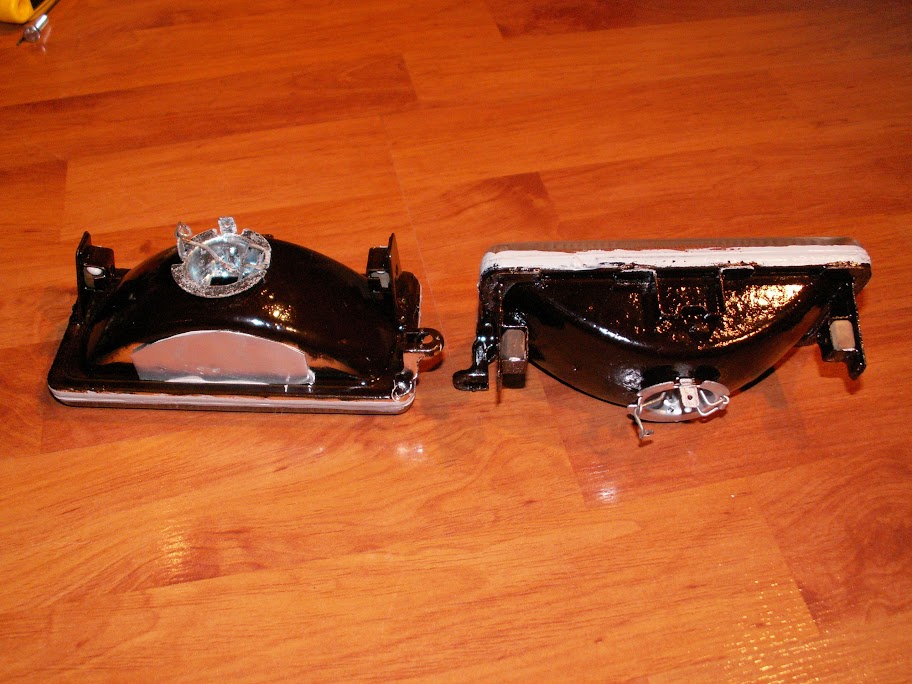
Just a quick update :
Today i received my fog lamps after regeneration, take a look :
before

after:

 |
|
| Back to top |
|
|
EdTBroom
***
Joined: 27 Jul 2009
Posts: 239
Location: Sheffield
|
| Posted: Tue Dec 13, 2011 21:16 Post subject: |
|
|
| Are you stilll there Bunny? |
|
| Back to top |
|
|
Slate
Lifetime member
Joined: 08 Aug 2011
Posts: 331
Location: Walsall, West Mids
|
| Posted: Wed Dec 14, 2011 12:00 Post subject: |
|
|
I've just read through the whole topic. You've done a fantastic job on the car Bunny, and thank you for taking the time to photograph the process too.
It really does look great now its going back together
You have inspired me to go out and replace my blown fog lamp bulb |
|
| Back to top |
|
|
cobra rob
*
Joined: 14 Dec 2011
Posts: 20
Location: Portadown
|
| Posted: Sun Dec 18, 2011 2:39 Post subject: |
|
|
| Dito and really enjoyed the restoration to date congrats and excellent work |
|
| Back to top |
|
|
JACUB
**
Joined: 06 Apr 2009
Posts: 55
Location: Notts / Derby border UK
|
| Posted: Sat Jan 14, 2012 21:42 Post subject: |
|
|
| Just found this thread and really enjoyed reading it from start to here. As said by others, thankyou for sharing and I'm looking forward to next installment |
|
| Back to top |
|
|
BUNNY_PL
***
Joined: 18 Jan 2009
Posts: 136
Location: Poland
|
| Posted: Wed Jan 18, 2012 16:08 Post subject: |
|
|
Thank You !!
First of all im not dead  just busy with finishing my studies and all other things. just busy with finishing my studies and all other things.
But good news - bumpers and all kind of plastics are finally finished !.
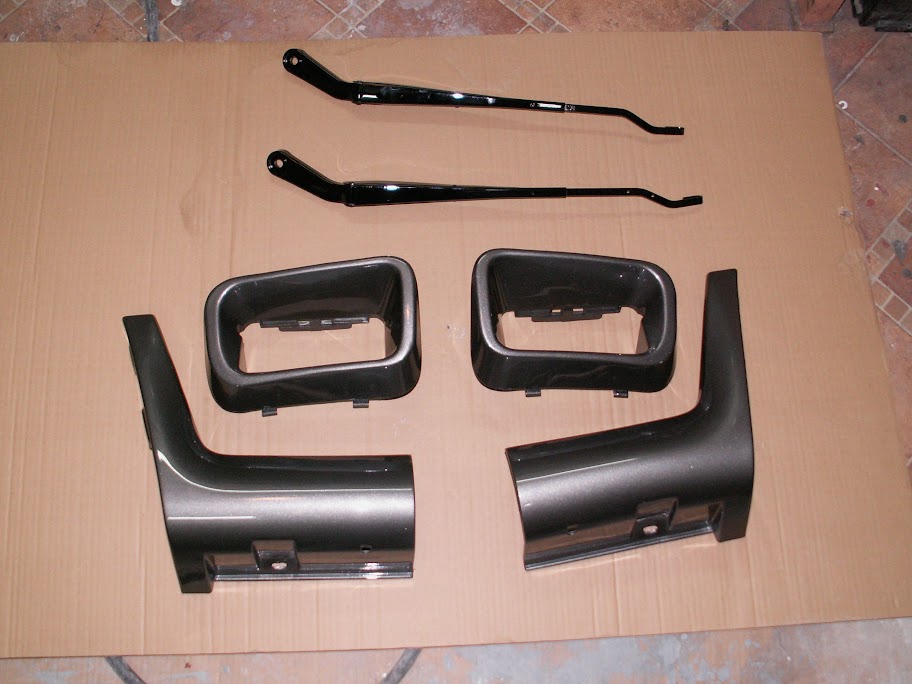
Original wiper arm is painted with some ridiculous spray paint - or whatever it is. I have sanded it down , primed with epoxy primer and than it was painted with black base + clear coat. Now it won't peel off ! and looks great in sunlight
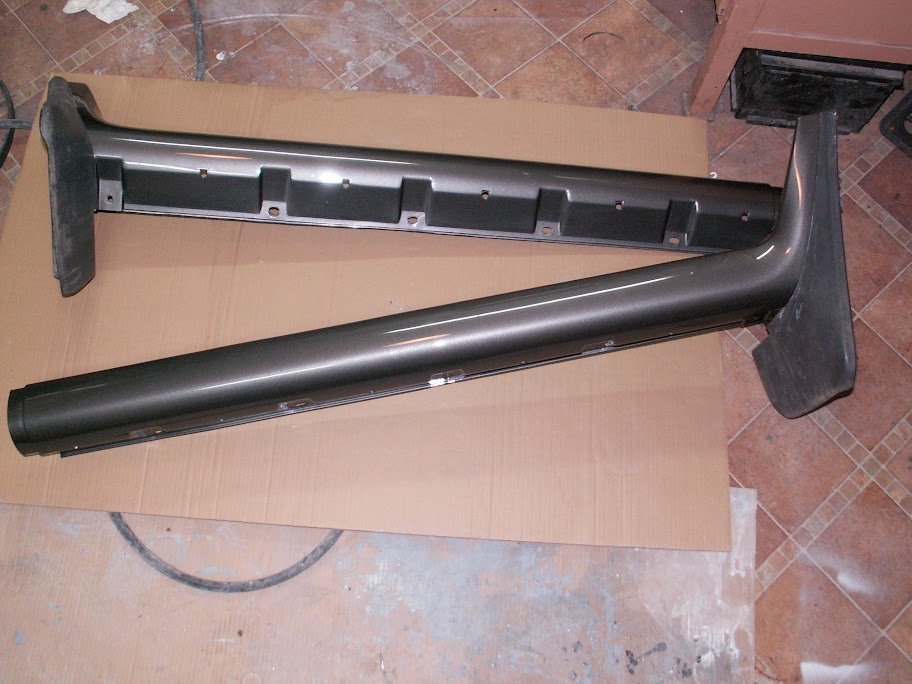
Working on bumpers was a real pain for me. Front bumper was broken and welded, then a lot of body filler was applied. Photos are not showing real life result. I will take car out and take photos .. soon .


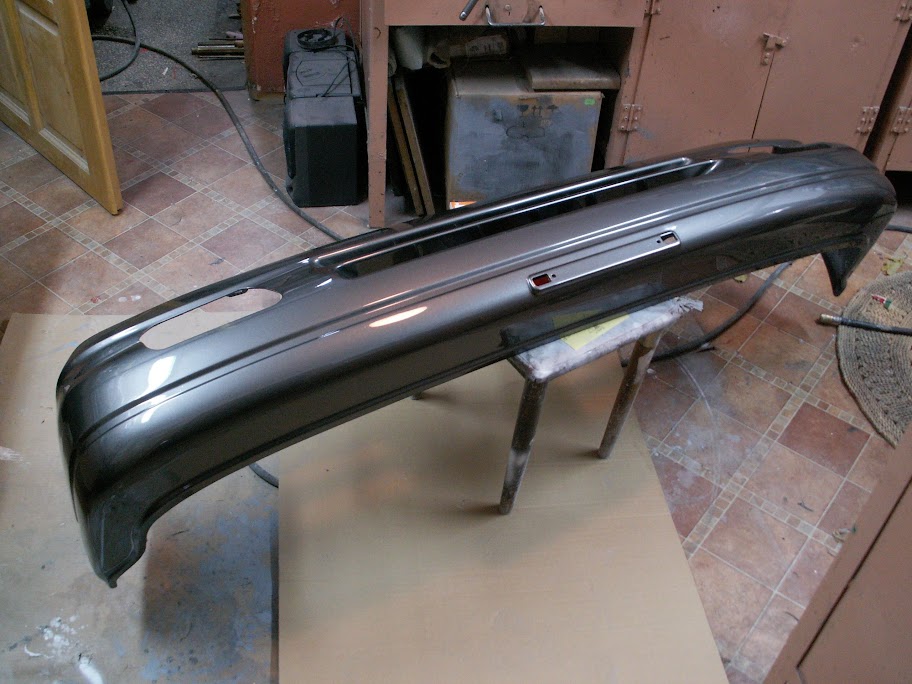
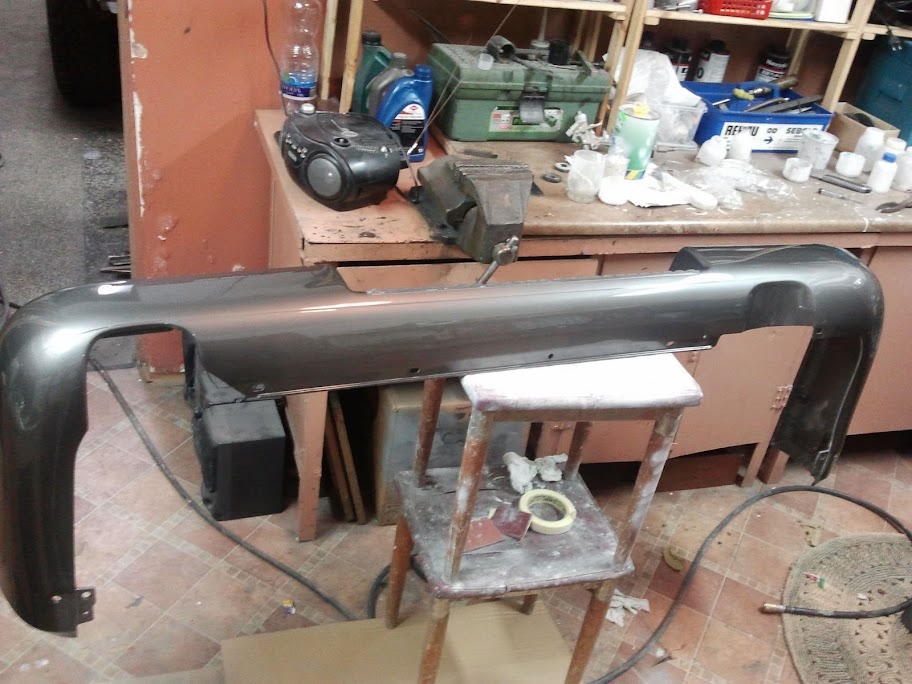
As You can see here i have changed my rear bumper. There will be no bumper lights any more and blanking holes was more expensive than used bumper... I bought some used from import versions and repainted it ..

As You can see its close to some final result. I have to put bumpers on, finish this &^$% rear lights and put interior back inside. I will have to do something with scratched interior panels. I still don't know how to do it  but i will figure something out . but i will figure something out . |
|
| Back to top |
|
|
JACUB
**
Joined: 06 Apr 2009
Posts: 55
Location: Notts / Derby border UK
|
| Posted: Thu Jan 19, 2012 21:01 Post subject: |
|
|
Bumpers are looking really good. Hope your studies are going well too.
I had to remove my back bumper to get at some rot and the metal inner parts of the bumper turned to dust. The tail lights were not in very good condition either so now I have trailer lights bolted to the body, not the prettiest look but got it through the MOT
_________________
1993 SWB 3.1 Trooper Duty |
|
| Back to top |
|
|
Sye
Lifetime member
Joined: 30 Jun 2007
Posts: 187
Location: Hutton, Preston, Lancs
|
| Posted: Sun Jun 03, 2012 12:35 Post subject: |
|
|
Any progress BUNNY-PL? Been a while..
_________________
''Drive it like you STOLE it''
No:000048
95 Commercial.
Merc E270 cdi.
He who dares,wins.
He who doesn't,don't |
|
| Back to top |
|
|
drinksoptional
*****
Joined: 21 Jun 2011
Posts: 590
Location: Scotland . South Lanarkshire
|
| Posted: Sun Jun 03, 2012 14:02 Post subject: |
|
|
Top job.
Make`s me think i should remove the body from the chassi on my Mk1 swb trooper.
Was removing the body easy i do not think i have enough concrete blocks mind you |
|
| Back to top |
|
|
darren m
******
Joined: 04 Jan 2006
Posts: 921
Location: nottinghamshire
|
| Posted: Mon Jun 04, 2012 11:00 Post subject: |
|
|
whats the colour code for those bumpers mate
_________________
93 SWB 3.1Turbo Duty intercooler
99 LWB 3.0 TD Citation
2000 LWB 3.0 / 3.1TD Duty conversion |
|
| Back to top |
|
|
BUNNY_PL
***
Joined: 18 Jan 2009
Posts: 136
Location: Poland
|
| Posted: Wed Jun 27, 2012 22:06 Post subject: |
|
|
Sorry Guys  i was busy with other trooper i was working on... i was busy with other trooper i was working on...
| Quote: |
| whats the colour code for those bumpers mate |
Darren its this same as body colour - ISUZU 849 + clear coat.
| Quote: |
| Was removing the body easy i do not think i have enough concrete blocks mind you |
drinksoptional , technically its easy but require some stamina . I would say go for it, its not moon landing
I don't even know where to start . Car is finished in 95 % - just few interior bits and few minor things all around the car.
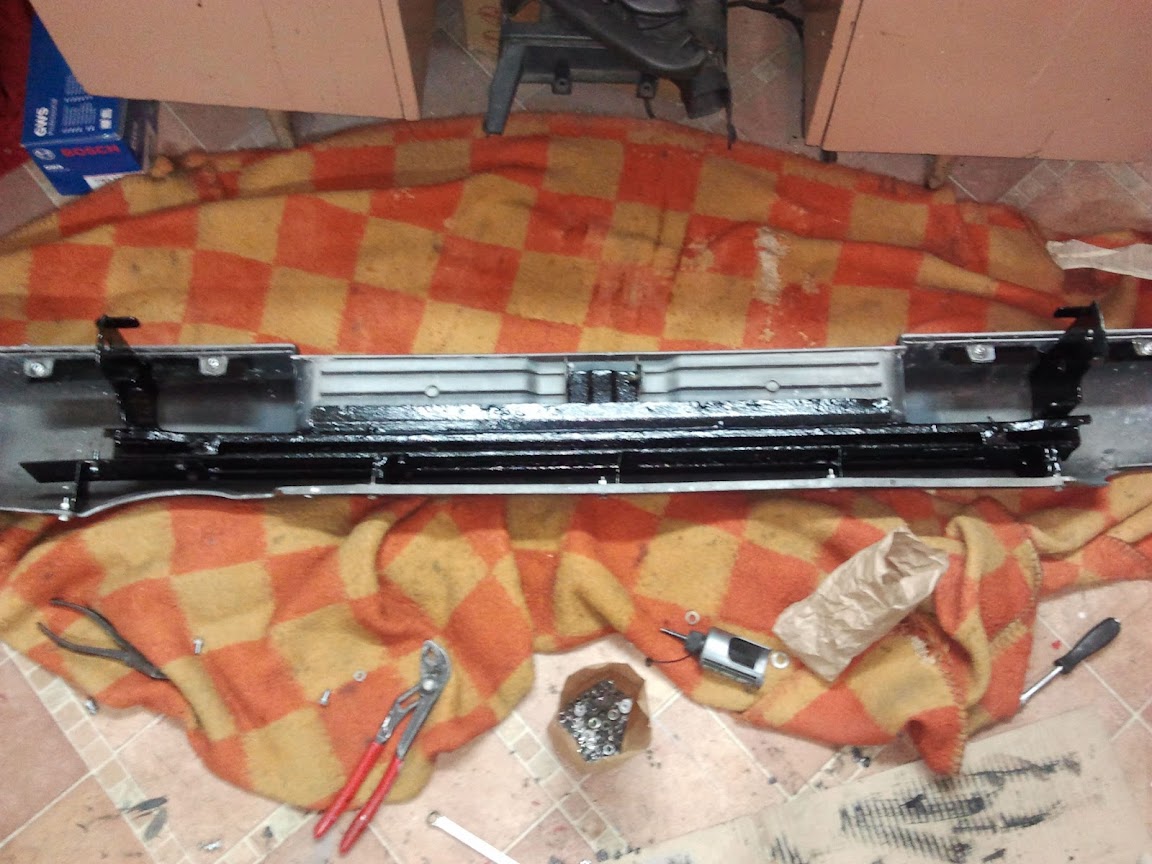
Lets finish bumpers maybe.

All metal bumper mounting parts were sandblasted.
Everything is covered in anti rust wax

I sealed all holes around fog-lights to prevent moisture and in result - rust.

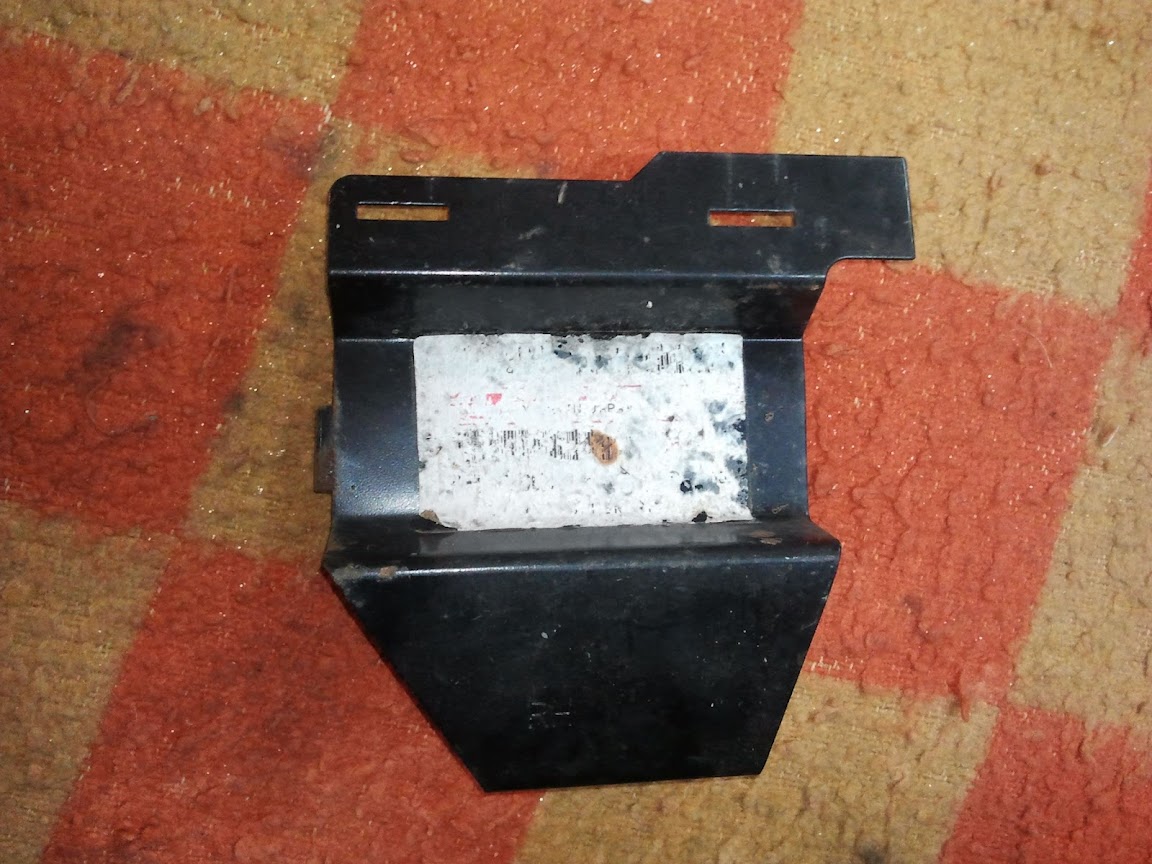
I was very lucky to find this brand new rear bumper mounts for silly money. Its also sealed as it should be !
--------------------------
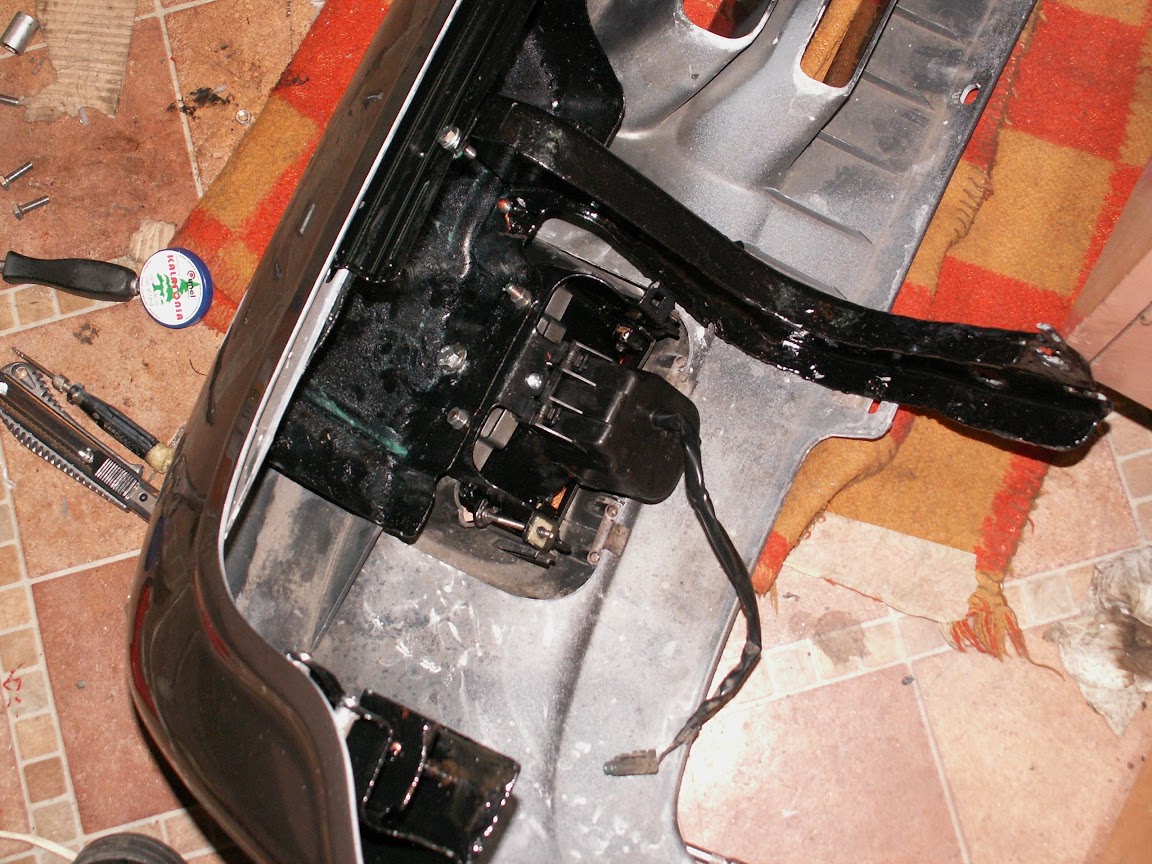
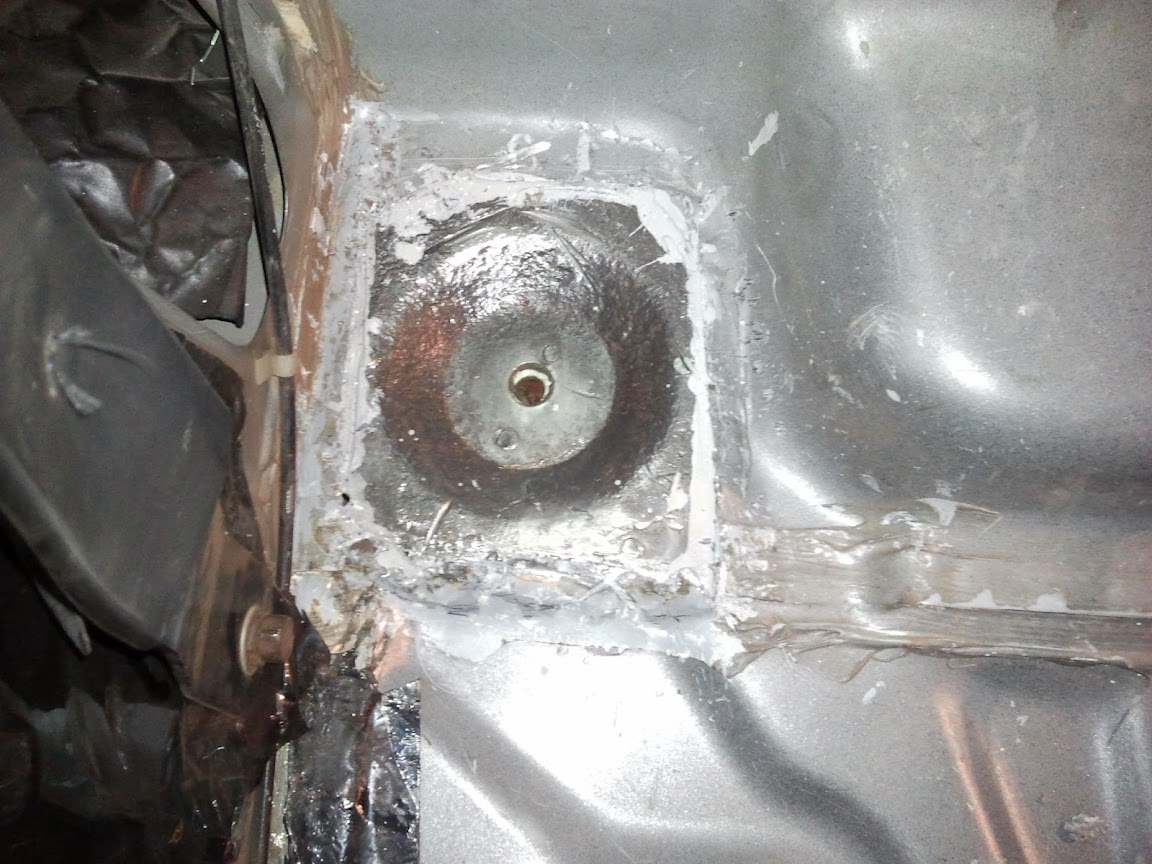
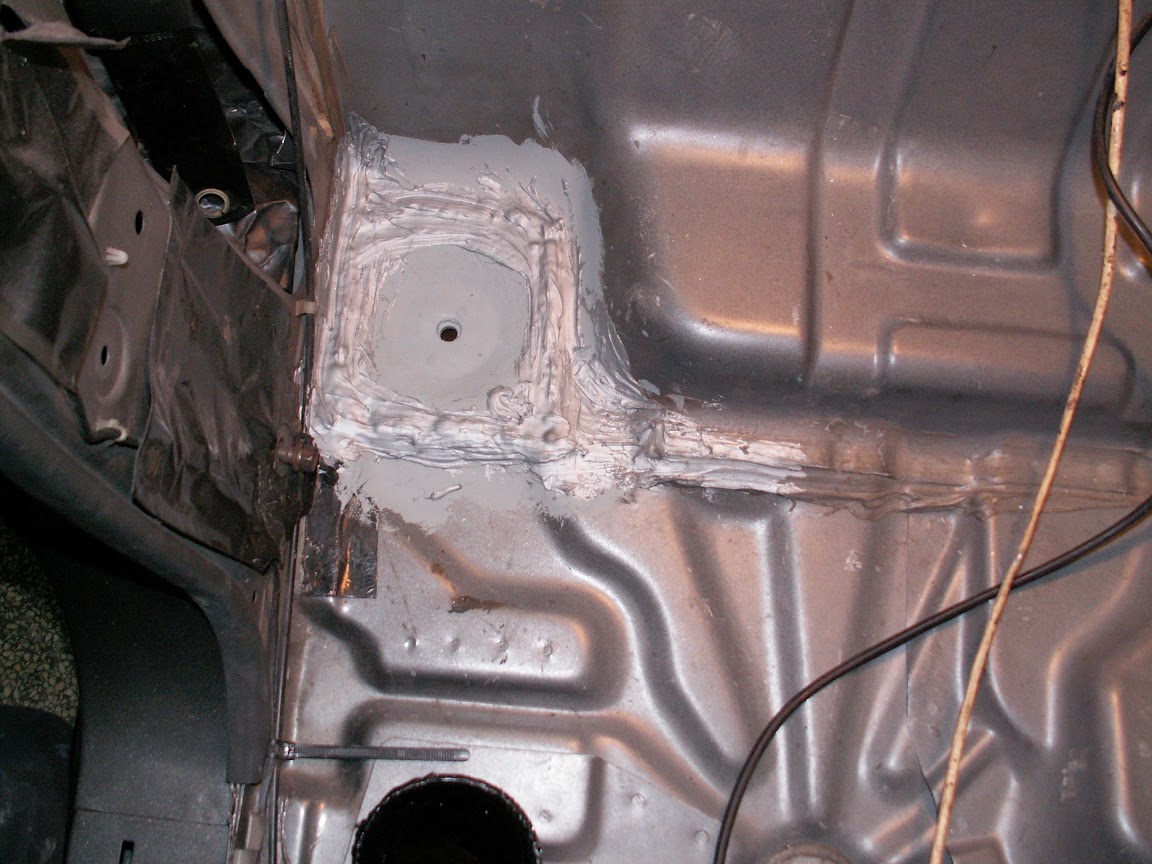
Now lets move inside. I knew that something was wrong with this floor part almost 2 years ago when i removed all interior. Guess what, i was right . Between 2 steal sheets i found some my worst enemy - rust. So i cut one sheet out, welded another to the floor and sealed everything correctly . It happens on both sides of the car. On driver side it was not that bad.


-----------
Then i moved more to the rear of the car . I cleaned all small rust spots on the floor and then i applied some rubber coating .
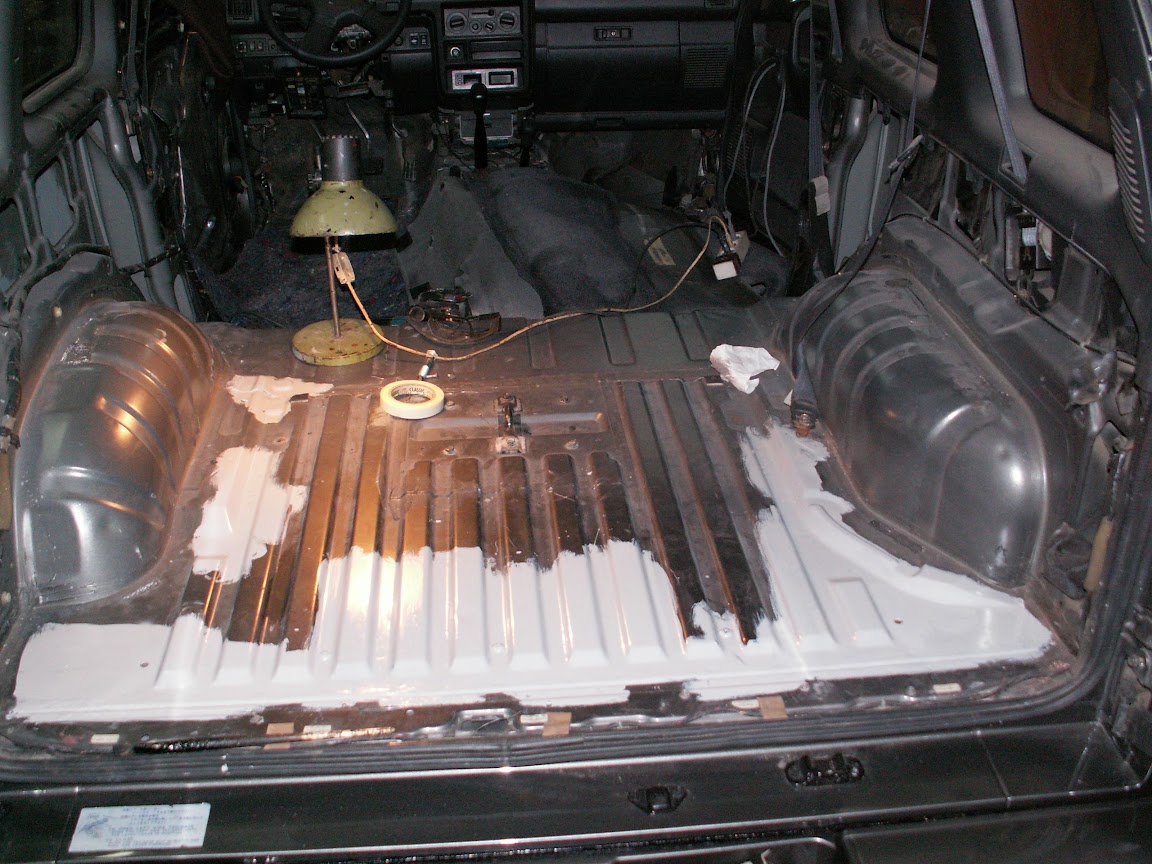

Then i ripped out all old stinking floor mats and replaced it with new foam type ones.

old one

new one.
----------------
Then it was time for rims refurbishing. After painting it looks like new.

and my old wheel nuts covered with new chrome

-----------
I promised myself that i will take photos after everything will be finished but for now i will show You how it looks right now. On the roof You can find dust collected for 2 years . After final polish i will post some better photos. Lets say it just some place holders
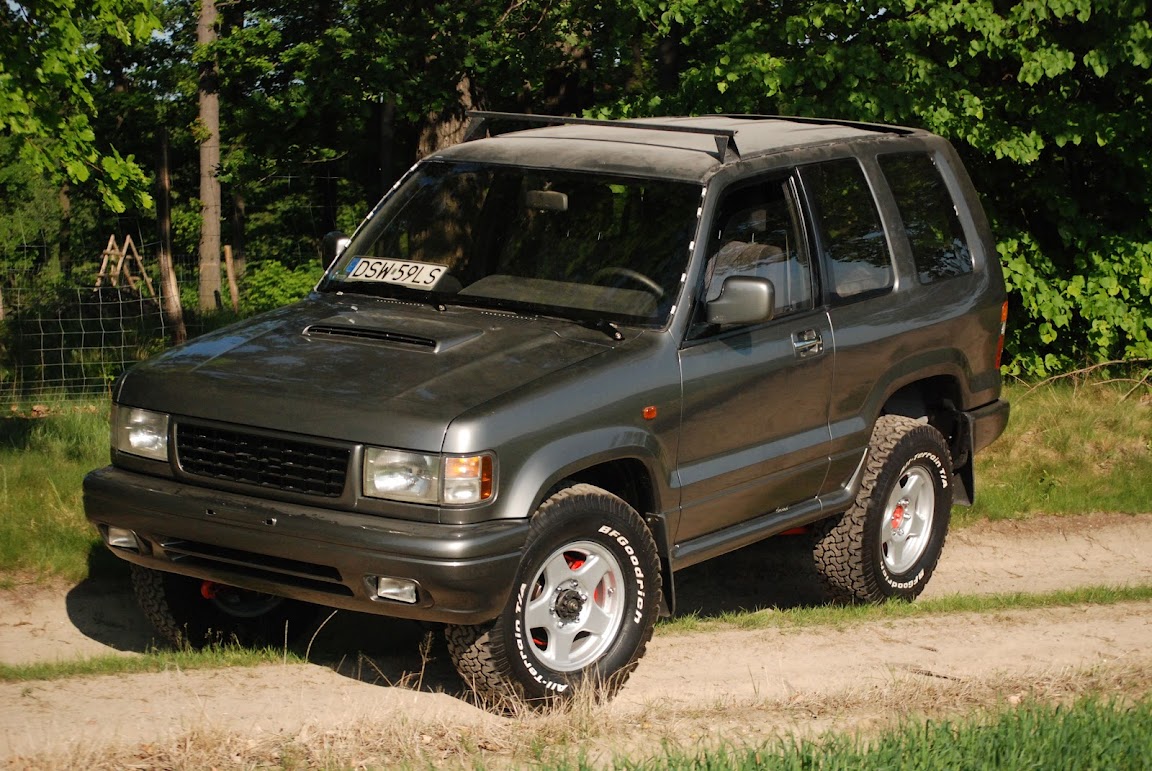
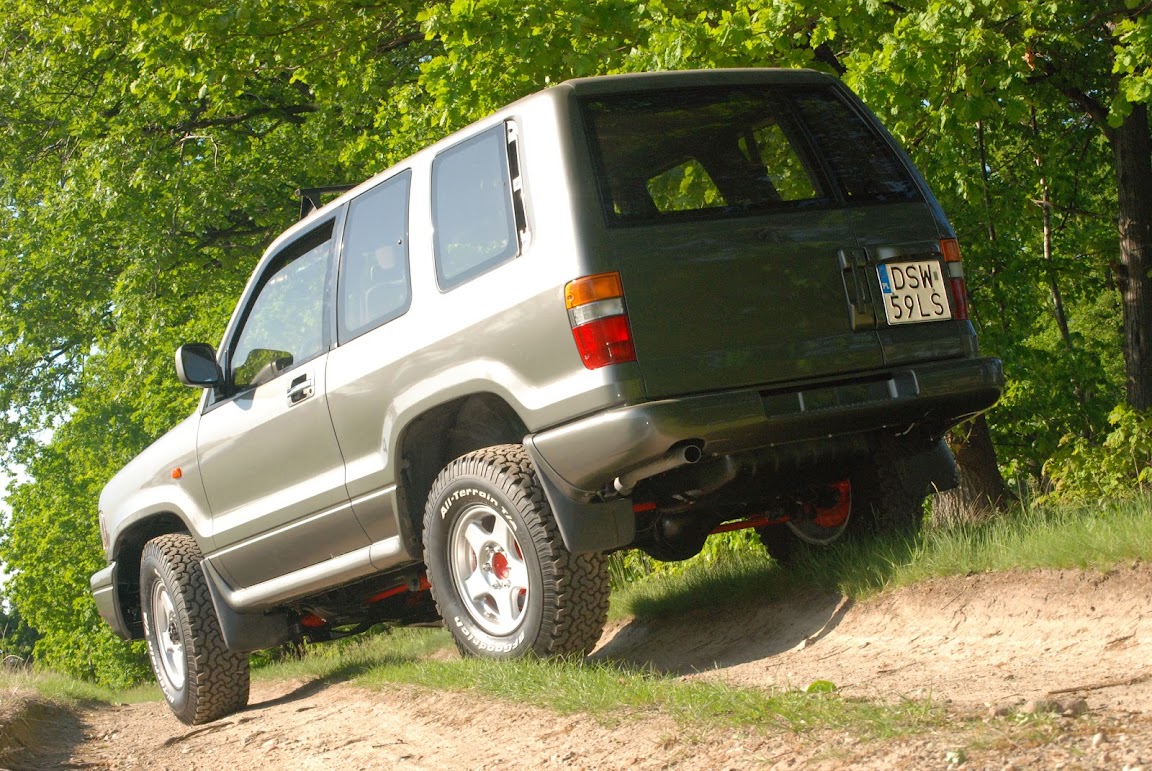

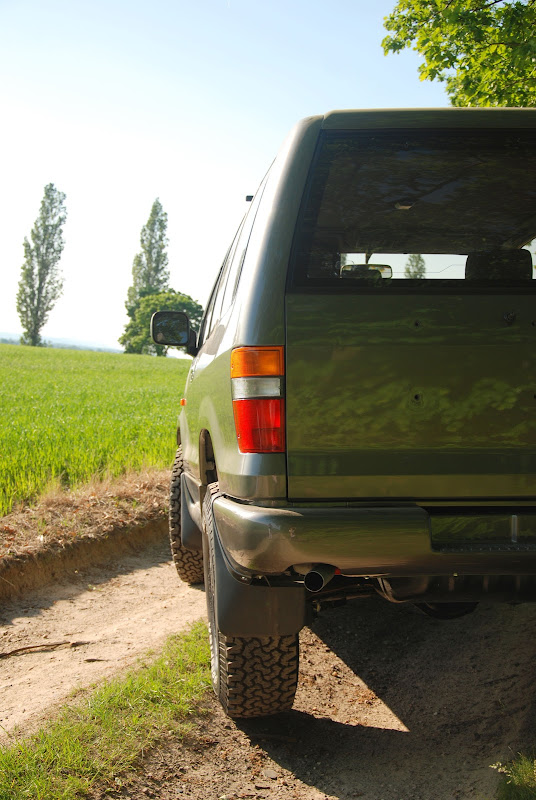
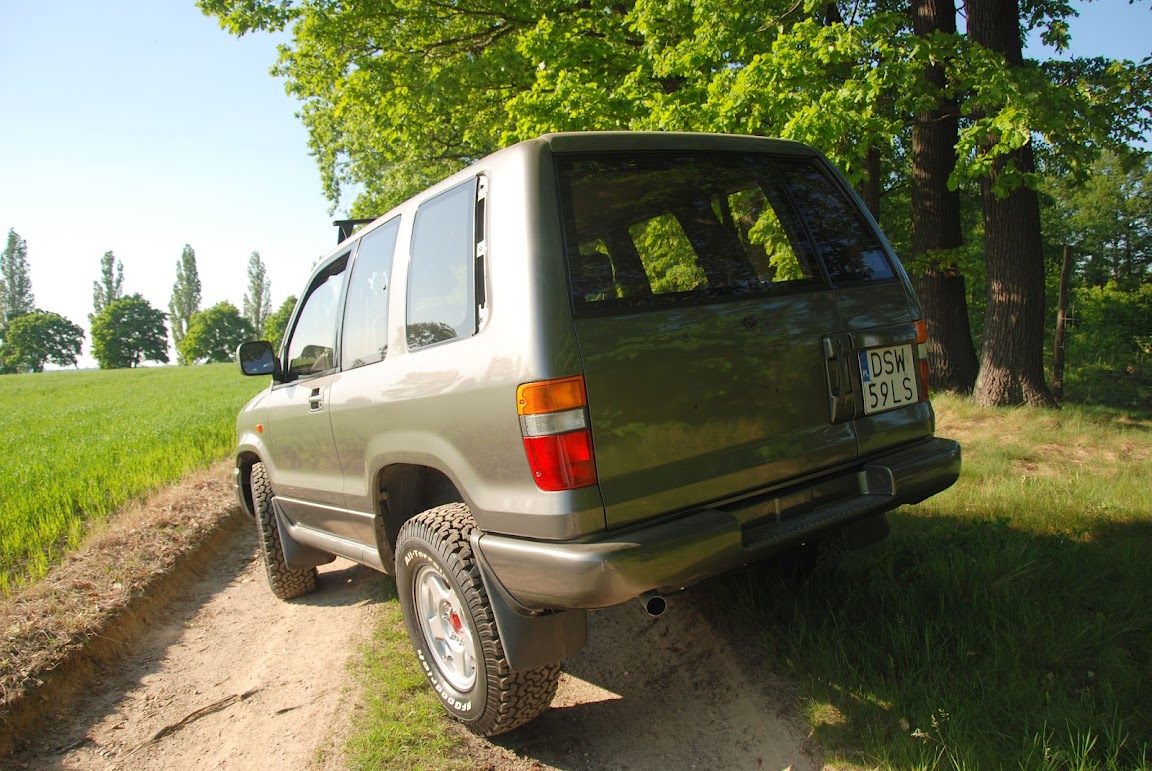

Now im trying to finish interior and some small bits around the car. I think im very close to the end . Car made 240 km !!! since rebuild . I will keep You updated. |
|
| Back to top |
|
|
|


